¶ Report Generator 3.1.7
The StrinGnosis Report Generator offers three general mechanisms for creating reports, with many options for tuning and customizing in each. Each option is a variation on the same principle: you start with a Word document that contains named bookmarks at the locations in the file where the StrinGnosis reporting elements should appear.
Quickest and simplest is to generate the default StrinGnosis report. It has a fixed layout, with a title page containing information from the Well Definition tab, including the Well Name, Lease, Project Code, Prepared Date, and more. Also included are a Table of Contents, the wellbore schematic, formation properties, casing design information, stress results, and thermal results.
The second option uses the same document formatting as the default report, but you start with a document containing your own set of reporting elements. Just as in the default report, you can select from the wellbore schematic, formation properties, casing design information, stress results, and thermal results. The details of this option, including which document elements can be formatted, are described in detail in the help section
With the third option, you have full control over the layout and appearance of your report, including its content and ordering within the document. In this option, you describe where your existing report resides and add named bookmarks to it. Those bookmarks determine where StrinGnosis should insert its results. A complete description of this mechanism is in the help section.
¶ Create Default Report
This is StrinGnosis report generation at its simplest. On the input form, you need only enter the location for the finished report by clicking the Browse… button next to that box. The default location is in the %userpath%\Documents folder, or for StrinGnosis Online, the Home Folder, but you can navigate to any location.
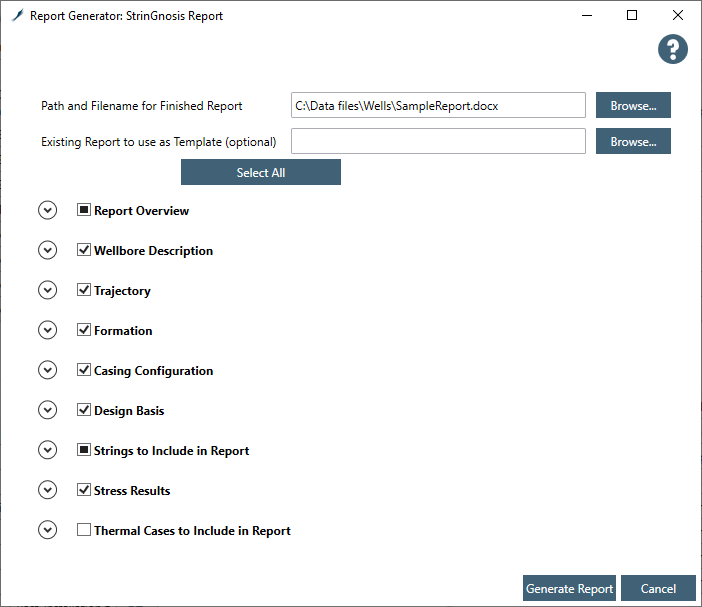
Next, you choose which items to include in the report by selecting them using the checkboxes. After making your selections, click Generate to create the report. When it is done, it is stored in the location you selected at the outset, and you have the option of viewing it immediately in Word, if Word is available.
The report elements include:
¶ Report Overview
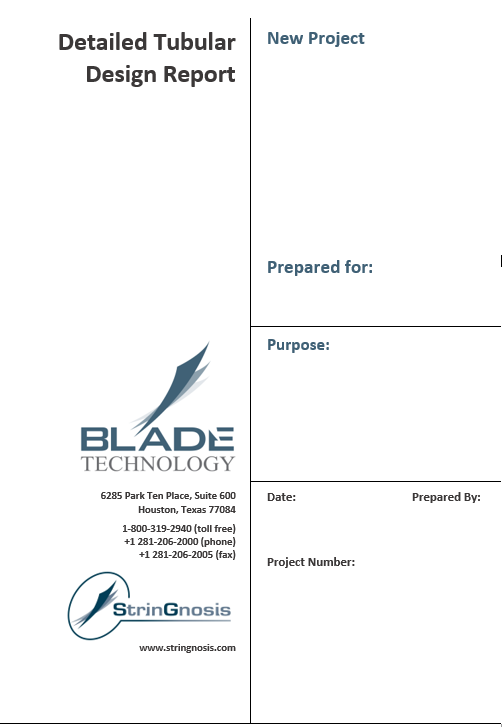
If this feature is selected, the report generator will take the Well Name, Well Description, Project Code, Project Date, Prepared For, and Prepared By fields from the Well Definition tab and insert them into the cover page table, as shown.
¶ Table of Contents
The report generator will automatically generate a table of contents for the sections of the report if this feature is selected.
¶ Wellbore Schematic
Causes the wellbore diagram to be included in the finished document.
¶ Wellbore Notes
Any text present on the main Well Definition tab in the Notes field will appear here if this feature is selected.
¶ Trajectory: Reach, DLS, NSEW
The three trajectory charts can be added to the document by selecting their checkboxes.
¶ Formation: Pressures
Causes a chart displaying the active pore and fracture pressure profiles to be added to the document.
¶ Formation: Temperatures
Causes a chart displaying the active temperature profile to be added to the document.
¶ Formation: Lithology
Causes a chart displaying the shale and salt layers to be added to the document.
¶ Casing Configuration Table
When this option is selected, the current casing table is added to the report.
Note: To hide columns or informational icons on the casing program table, right-click on it and select Column Options or uncheck Show Warnings, respectively.
¶ Tubular Performance Table
When this option is selected, the current layout of the tubular performance table is added to the report.
¶ Connection Performance Table
When this option is selected, the current layout of the connection performance table is added to the report.
¶ Strings to Include in Report
Under this checkbox is a list of all the strings in the project that have calculated stress loads. You may wish to include only a subset of those strings, so you can select which ones to include by clicking the checkbox next to them. Every calculated load on a selected string will be reported, so to choose which loads to report, you can, in the stress calculator, calculate only those loads. By default, those strings are selected which have calculated loads.
¶ Stress Results: Safety Factor Overview
If this option is checked, the safety factor summary table for each selected string is included in the report.
¶ Stress Results: Safety Factor Details
This option generates tables containing details of safety factor results for each load on the selected string. If the string has connections, a separate table detailing the connection safety factors is also generated.
¶ Stress Results: Load Description Summary
If selected, a table appears for each selected string summarizing the load descriptions (text about the pressure and temperature profiles) for each calculated load.
¶ Stress Results: Design Envelope
If selected, a chart appears under each selected string, for each string section, showing the VME diagram for the string section with all the calculated loads plotted with respect to that diagram.
¶ Stress Results: Load Pressure Profiles
If selected, for each calculated load, a chart of the load’s pressure profiles is added to the report.
¶ Stress Results: Load EAF and RAF Profiles
If selected, for each calculated load, a chart of the load’s force profiles is added to the report directly after its pressure profiles.
¶ Thermal Cases
In this section is a list of all the thermal cases in the project. You may wish to include only a subset of them in the report, so you can select which ones to include by clicking the checkbox next to them.
¶ Custom Content Reports
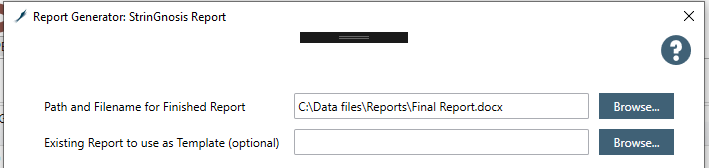
This option gives you a bit more control over the visual elements in your report. It allows you to specify a Word document (.DOCX) that contains the document contents and layout that you want applied to the report. Choose your template by clicking the Browse… button next to the "Existing Report to use as Template" box.
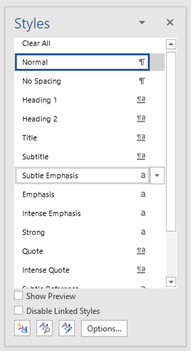
Most Word style elements are supported by the formatting option, including Heading1, Heading2, Heading3, Title, Subtitle, Emphasis, Strong, Quote, Normal, Plain Table, Grid Table, List Table and more. For a complete list of Word Style elements, type Alt-Shift-Ctrl-S in Word, or select Apply Styles from the formatting ribbon in Word:
To include reporting elements in your document, add bookmarks to the document at the locations where the elements should appear. More information about Word bookmarks is in the next section.
After making your selections, click Generate to create the report. When it is done, it is stored in the location you selected at the outset, and you have the option of viewing it immediately in Word, if Word is available.
¶ Report Based on Existing Document
The existing document can be your own company report template, which might contain project criteria, formation history, etc., or it can be an existing StrinGnosis report from a previous report generation. Either way, the mechanism is the same: Find or insert bookmarks into the document where you want the reportable elements to appear, save the document, select it in the report generator window, and click Generate.
To add Bookmarks to a Word document, open it in Word 2010 or later, and select Insert > Bookmark.

A list appears containing the bookmarks defined in the document.
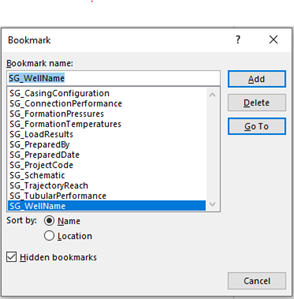
Initially there are usually none. To direct the Report Generator where to place your reporting elements, you will add bookmarks at the locations in the file where you want those elements to appear. The bookmark names must have the prefix “SG_” to be recognized by the StrinGnosis Report Generator. Recognized bookmarks are:
- SG_ProjectSummary
- SG_PreparedBy
- SG_PreparedDate
- SG_PreparedFor
- SG_ProjectCode
- SG_Lease
- SG_WellDescription
- SG_WellName
- SG_TableOfContents
- SG_Notes
- SG_Schematic
- SG_TrajectoryReach
- SG_TrajectoryDLS
- SG_TrajectoryNSEW
- SG_FormationPressures
- SG_FormationTemperatures
- >SG_FormationLithology
- SG_CasingConfiguration
- SG_DesignFactors
- SG_DesignBasis
- SG_TubularPerformance
- SG_ConnectionPerformance
- SG_StressResults
- SG_SafetyFactorsOverview
- SG_SFDetails
- SG_LoadDescriptionSummary
- SG_DesignEnvelope
- SG_LoadPressures
- SG_LoadForces
- SG_ThermalCaseProfile
Once you have selected the elements that should be included in the report and specified a location for the completed report, you can click Generate.
When it is done, you have the option of viewing it immediately in Word, if Word is available.
¶ Report Troubleshooting
If the generated report does not have the expected content or appearance, here are a few possible causes and solutions.
Too many loads showing up: If your report contains too many loads, making tables that are too long or charts that are too crowded, discard results on the non-essential loads so that they do not appear, and re-run the report. Only calculated loads and thermal cases appear in the report.
Load not showing up: If an expected load is not appearing in the report, confirm that it has actually been calculated. Only calculated loads and thermal cases appear in the report.
Feature not being reported: Open the template document in Word and click Insert > Bookmarks. Ensure that there is a bookmark in the document for the feature, or add it back if it is missing; it may have been inadvertently deleted.
Feature getting placed in an unexpected location: It is possible that a bookmark is not at the exepected location. Word Bookmarks are not visible by default, so it is very helpful to make them visible to troubleshoot bookmark issues. To make them visible, open the document in Word and under File > Options > Advanced > Show Document Content, click Show Bookmarks. Click Save. Now bookmark locations will be shown as gray I-beam shapes. Move the bookmark to the desired location or add paragraphs before or after it as needed. To move a bookmark, it is easiest to delete it via the Insert Bookmarks dialog, then reinsert it at the desired location using that same dialog.
Page is in portrait layout but results require landscape, or vice versa: Open the Word document, navigate to page that should be modified, and select the page contents. On the Word ribbon, select Layout and open Page Setup. Select Landscape (or Portrait, as required), and in the Apply To box, choose Selected Text.
Existing .doc report not working: The StrinGnosis report generator can only use Open XML .DOCX documents.
Error message “Bad bookmark detected”: A Word bookmark cannot span multiple paragraphs. If you see this message, the report generator has detected a bookmark that starts in one paragraph but ends in another. It must be deleted, and a new bookmark can then be placed in the correct location.
Unexpected Formatting of Results: If a bookmark is not correctly formatted, the StrinGnosis report output can become misformed. Be sure that all bookmarks span only the relevant text, with no white space within them. The first example shows an incorrectly formatted bookmark, and the second shows a correctly formatted one.


Warning appears upon opening generated document: The warning illustrated below appears when your generated document contains a table of contents. This is a security feature of Microsoft Word, and the fields in question are the fields that refer to the table of contents items. Click Yes to have it update the table of contents automatically. If you click No, you can update the table of contents manually by navigating to it, right-clicking on it, and selecting "Update Table".

In default report form, some checkboxes are disabled. The checkboxes are enabled according to the bookmarks that appear in the starting report template. If you base your report on a template that does not include bookmarks for some features, those features for which there are no bookmarks will be disabled. This is because, without bookmarks to specify the locations, the StrinGnosis Report Generator would not be able to determine where to place those results in the final report file. Solution: In "Existing Report to use as a Template", navigate to a .docx file that contains bookmarks for all the report results that you wish to include in the final report.